How to calibrate the X-Wall
When the touch functionality on the screen is not working properly, this can often be resolved by recalibrating the sensor.
Below is a step-by-step guide on how to easily perform the calibration.
Step 1.
For proper calibration, it is important that nothing is positioned in front of the screen during the process.
Use the computer keyboard and press the Windows key ( ) + D at the same time to exit the X-Wall software and go to the Windows desktop.

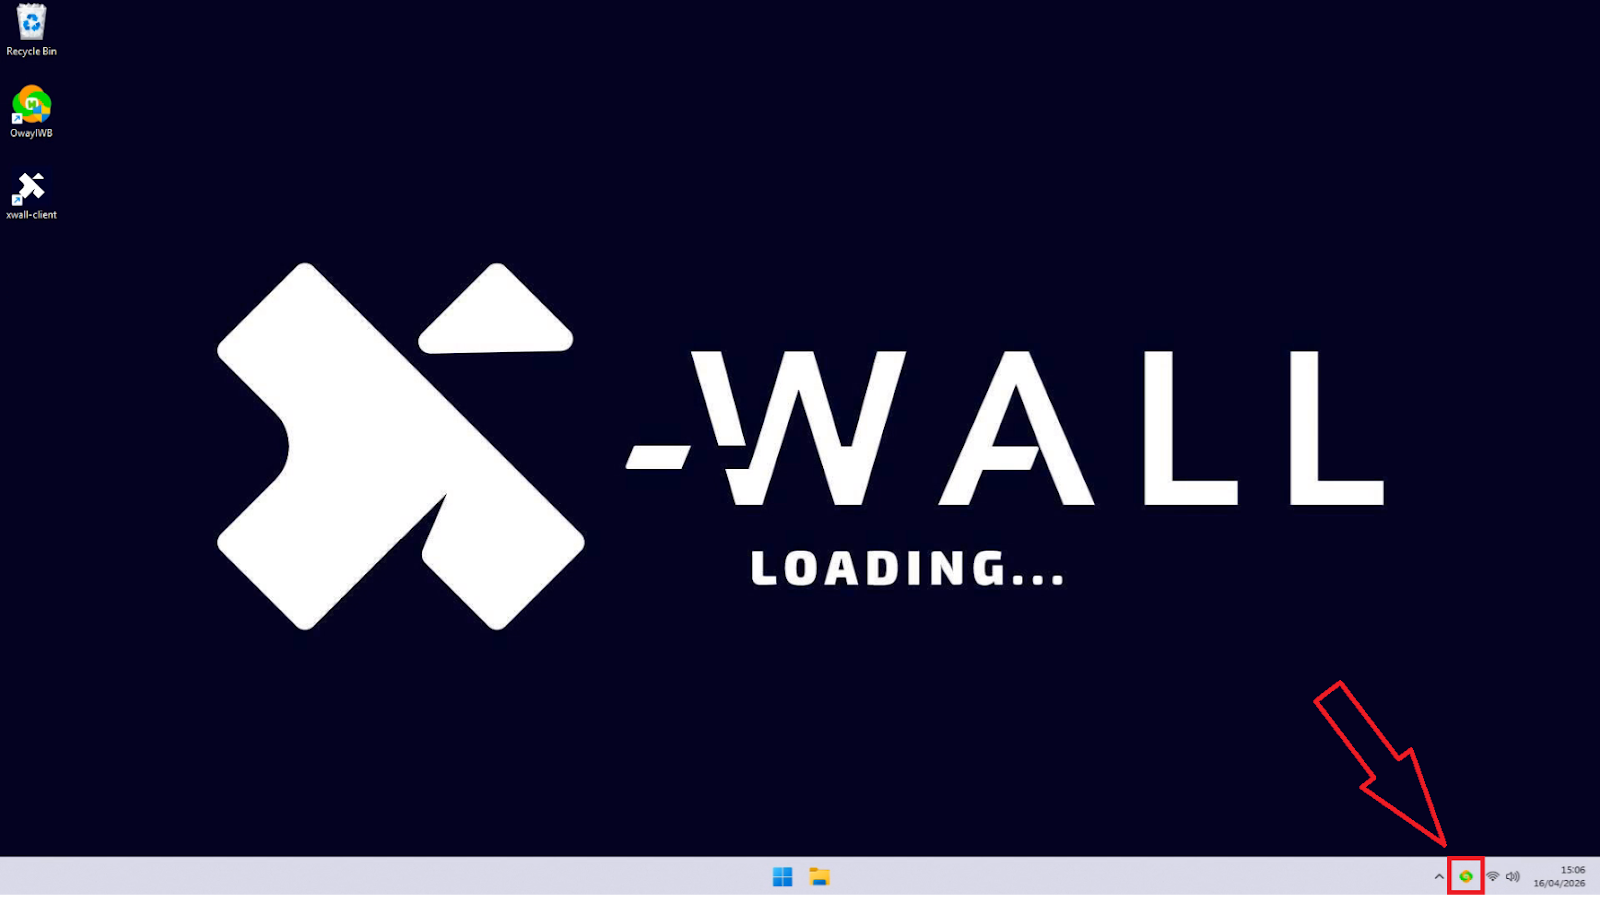
Step 2.
Move the mouse to the bottom-right corner of the taskbar and click the sensor icon.
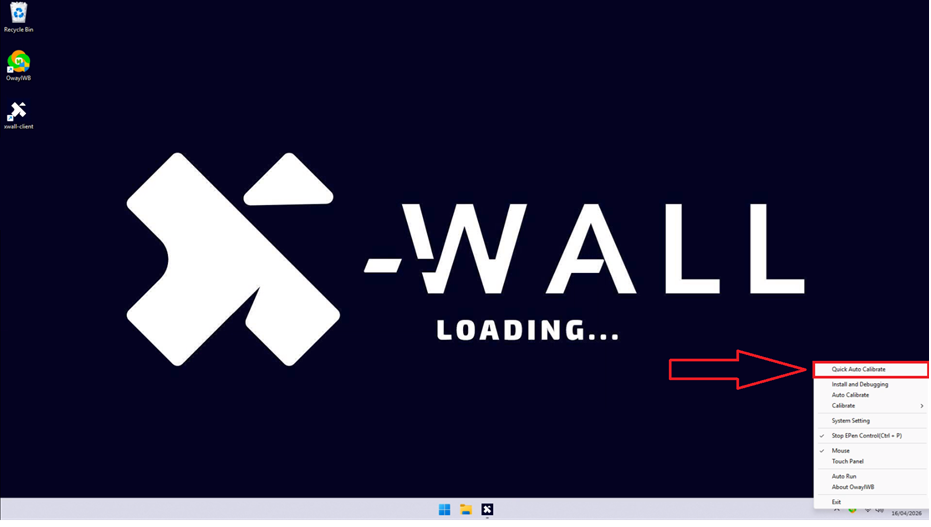
Step 3.
In the menu that opens, click the “Quick Auto Calibrate” option.
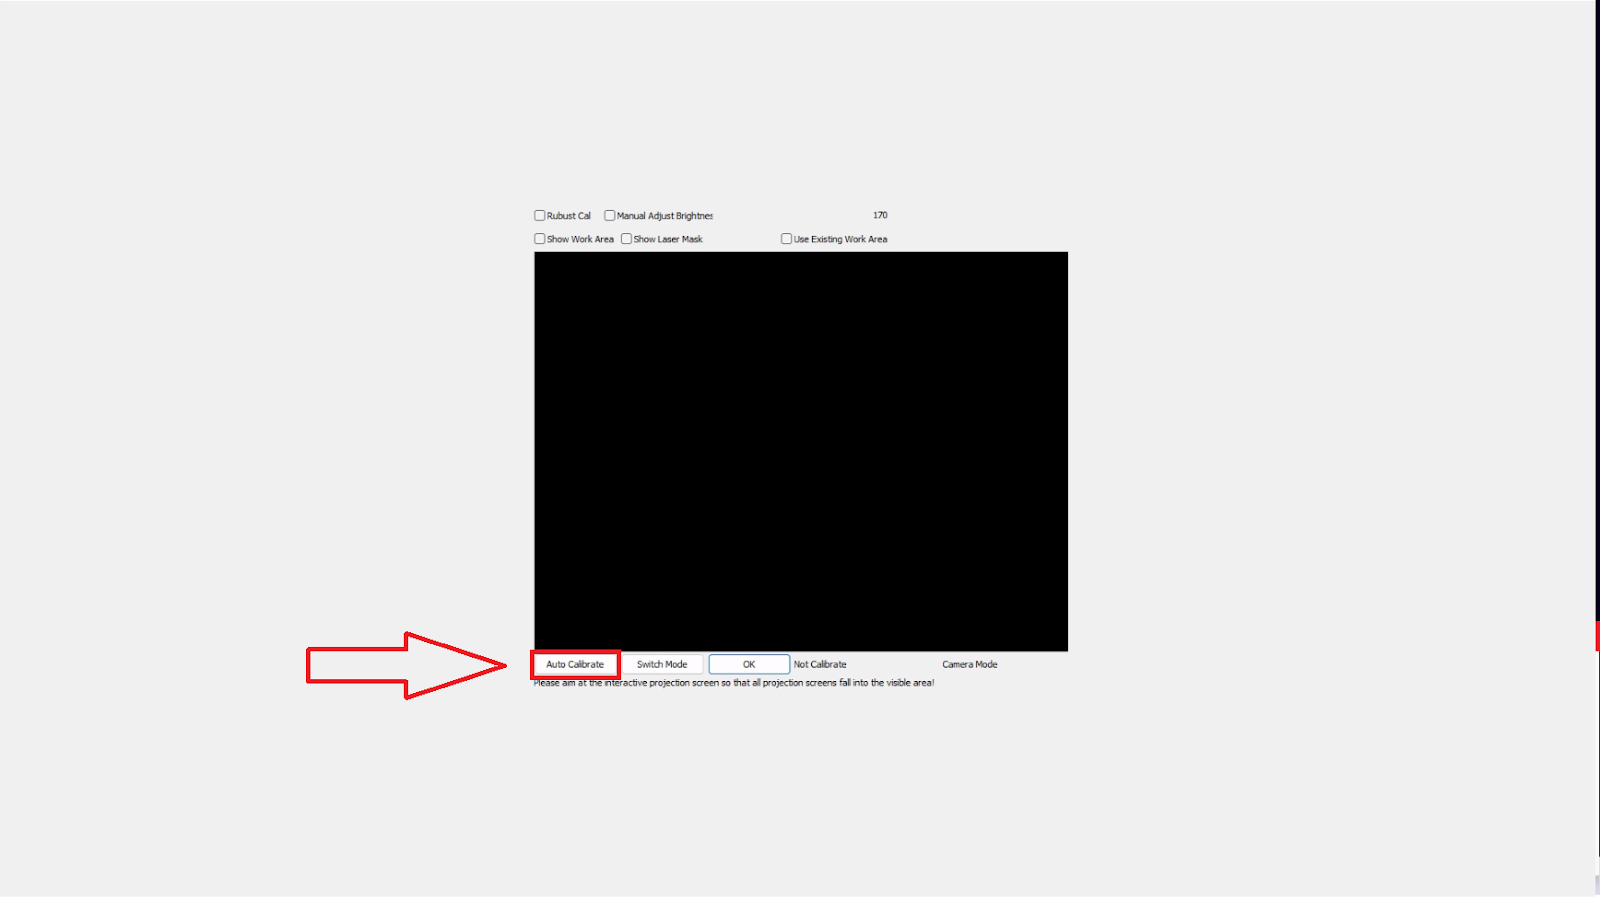
Step 4.
A new calibration window for the sensor will open.
In this window, click the “Auto Calibrate” button.
It is possible that the auto calibration does not work correctly immediately.
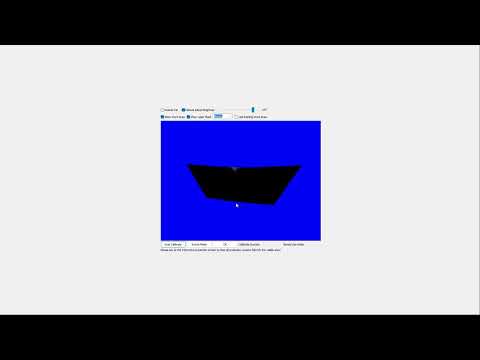
In those cases, it is recommended to enable the “Manual Brightness” checkbox and adjust the slider.
In the camera image shown below, you should only be able to see the laser line.

Step 5.
The screen will now flicker a few times while the system automatically adjusts the brightness.
You do not need to do anything during this process.
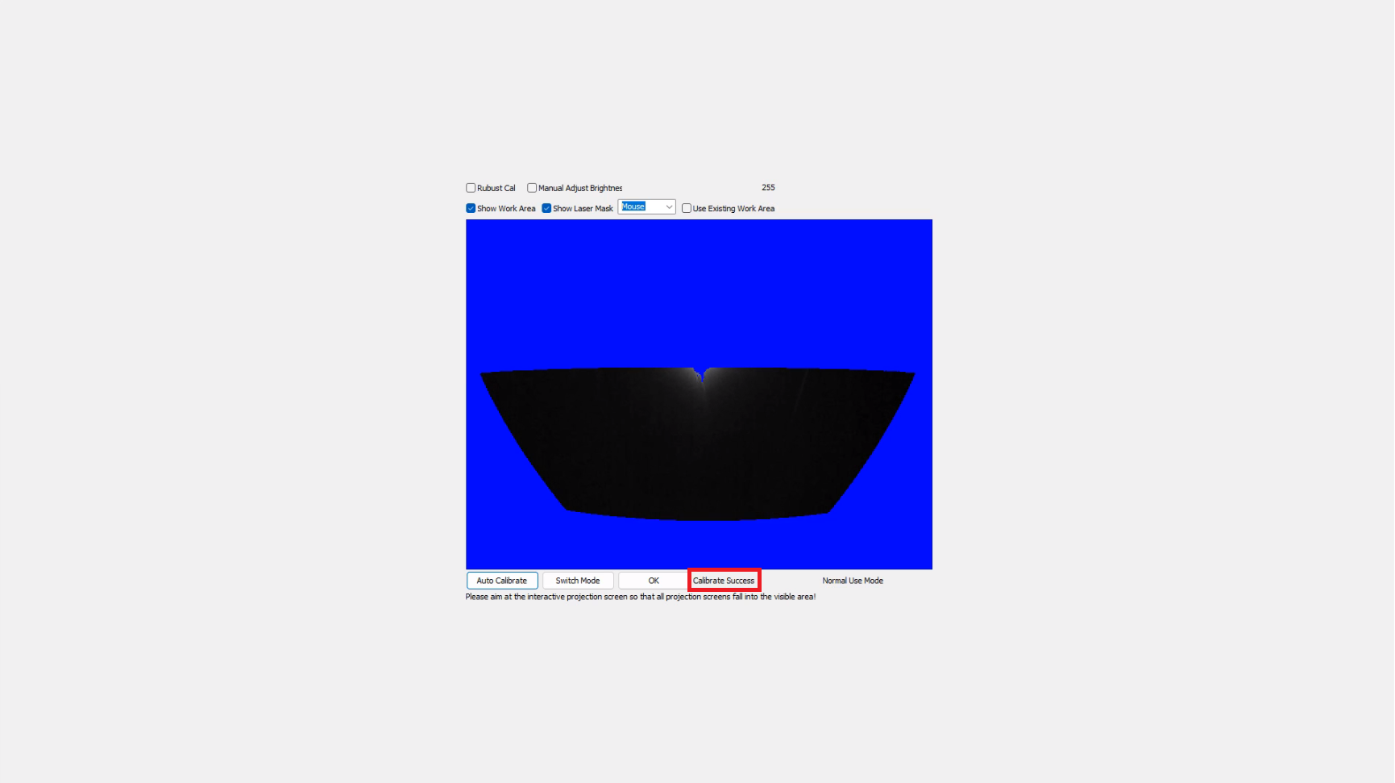
Step 6.
After calibration, the tool will indicate whether the calibration was successful.
You should see the message: “Calibrate Success”
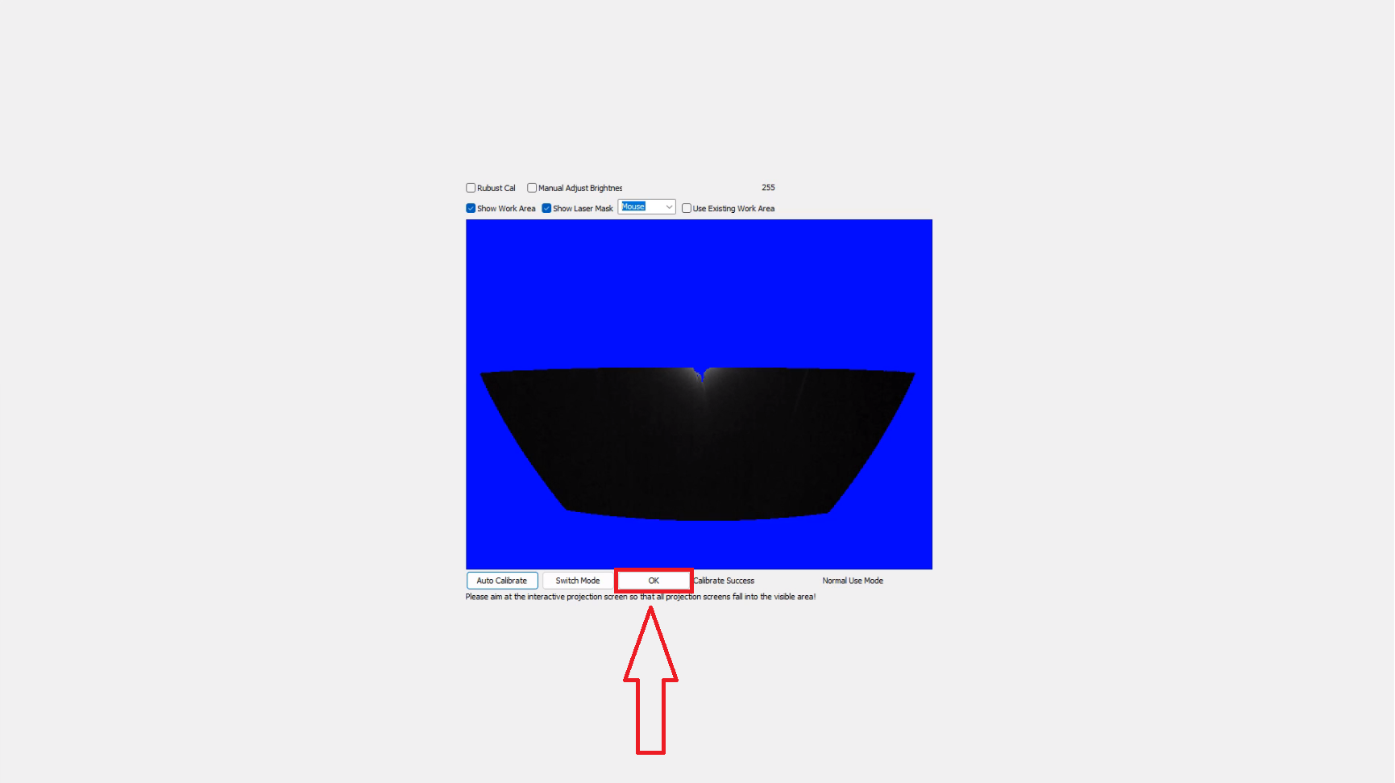
Step 7.
Press the “OK” button to close the calibration tool and return to Windows.
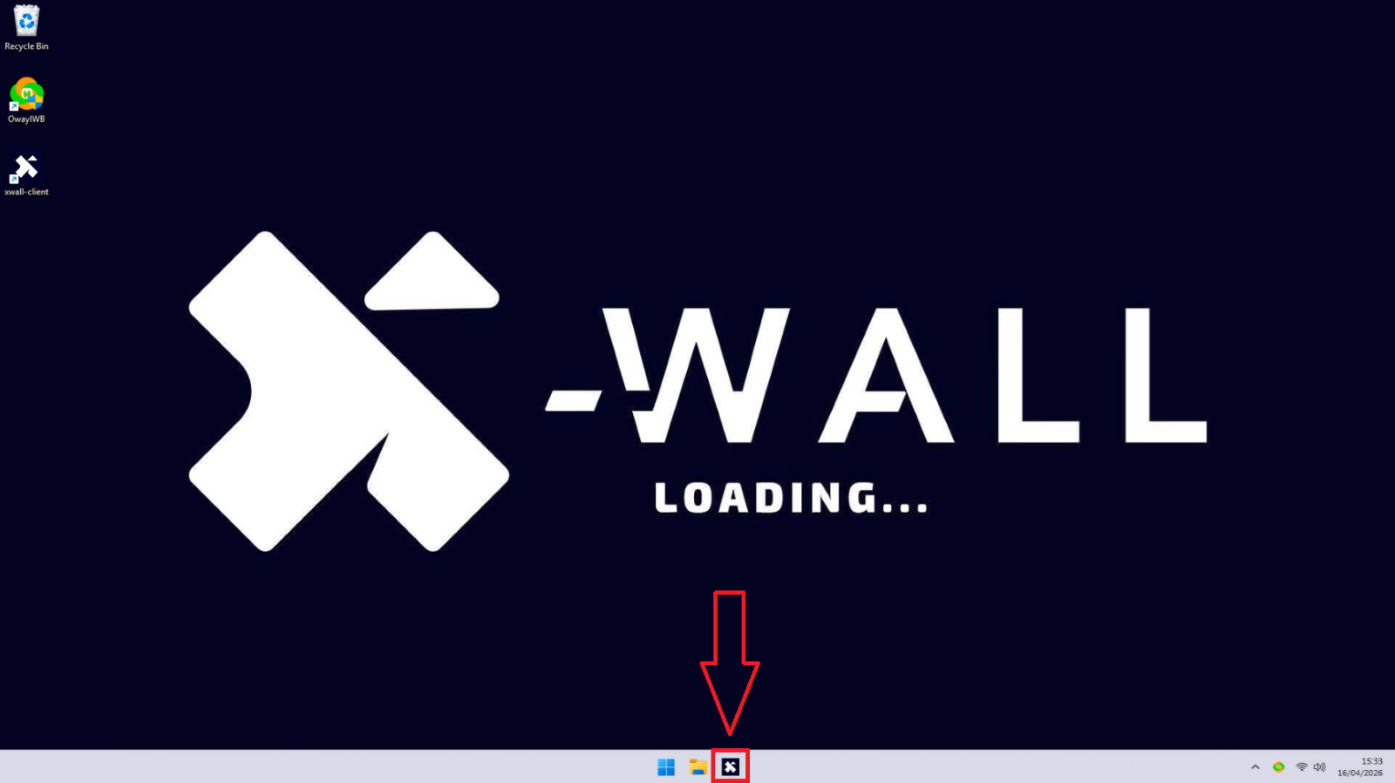
Step 8.
Move the mouse to the bottom of the taskbar and click the X-Wall icon to return to the games list.
Was this article useful?
Your feedback helps us keep the Knowledge Base sharp.